|
Stephanie's Homepage
|
Data/Monte Carlo Comparison
This page deals with the discrepancy between Experimental Data and CORSIKA that is seen in all analyses. The first section tracks the discrepancy for this analysis at each level, and the second section is an in-depth look at the discrepancy at the BDT level.
Excess in COG
This plots below show the differences between Experimental Data and Monte Carlo for the Centre of Gravity reconstructions. The ratio of Data/MC is tracked at each level.
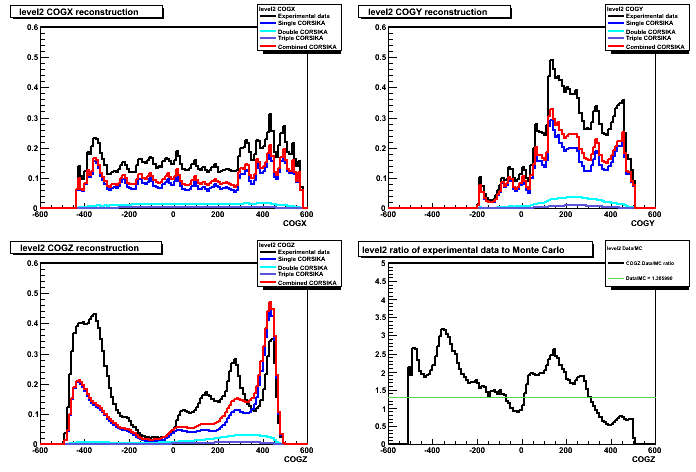 |
Level 2Data = 1.62998 × 101 HzMonte Carlo = 1.24808 × 101 HzExcess of Data over Monte Carlo = 1.30599 StatisticsData: burn sample runs 111460, 111490, 111530 (6.74 hours)Monte Carlo: ~6 days unweighted single, double and tripleSignal: dataset 2182 |
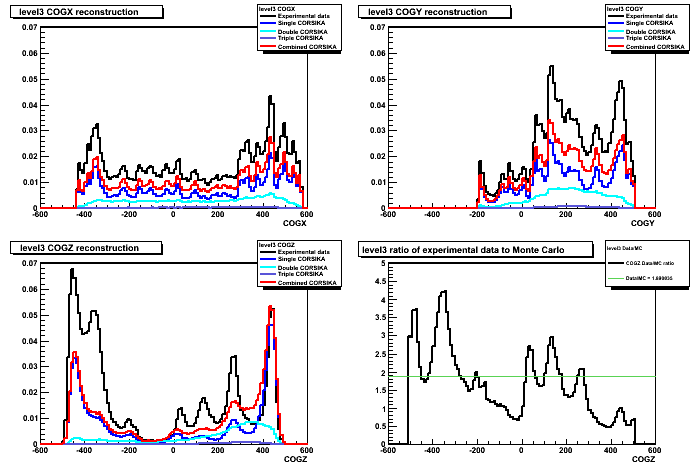 |
Level 3Data = 1.74854 × 100 HzMonte Carlo = 0.924745 × 100 HzExcess of Data over Monte Carlo = 1.89083 StatisticsData: burn sample from August only (54.01 hours)Monte Carlo: ~6 days unweighted single, double and tripleSignal: dataset 2182 |
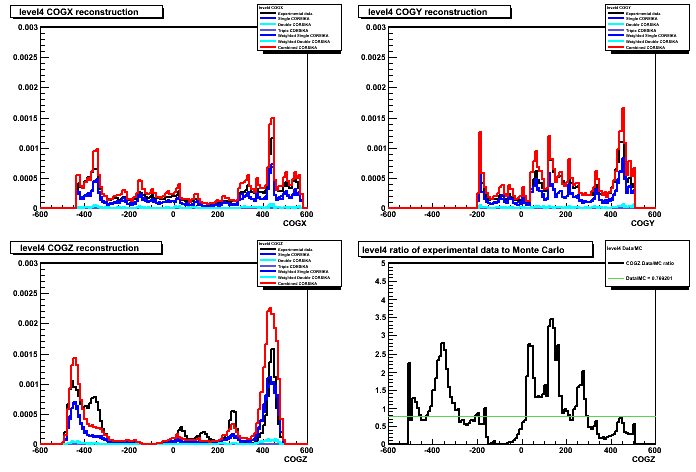 |
Level 4Data = 2.54148 × 10⁻² Hz Monte Carlo = 3.330405 × 10⁻² Hz Excess of Data over Monte Carlo = 0.769201 StatisticsData: whole burn sampleMonte Carlo: allSignal: dataset 3221 |
 |
Level 5Data = 2.08697 × 10⁻³ Hz (6556 events)Monte Carlo = 2.49128 × 10⁻³ Hz (7611 events)Excess of Data over Monte Carlo = 0.83771 StatisticsData: whole burn sampleMonte Carlo: allSignal: dataset 3221 |
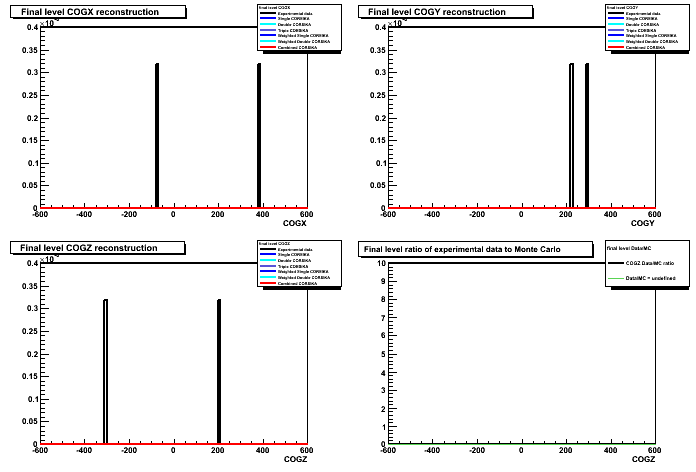 |
Final levelData = 6.3666 × 10⁻⁷ Hz (2 events)Monte Carlo = 0 Hz (0 events)Excess of Data over Monte Carlo = undefined StatisticsData: whole burn sampleMonte Carlo: allSignal: dataset 3221 |
Figure 1: Reconstructed Centre of Gravity at each cut level using a) COGX, b) COGY, c) COGZ, d) Ratio of experimental data to all Monte Carlo in COGZ. The green horizontal line is the mean excess of data over Monte Carlo.
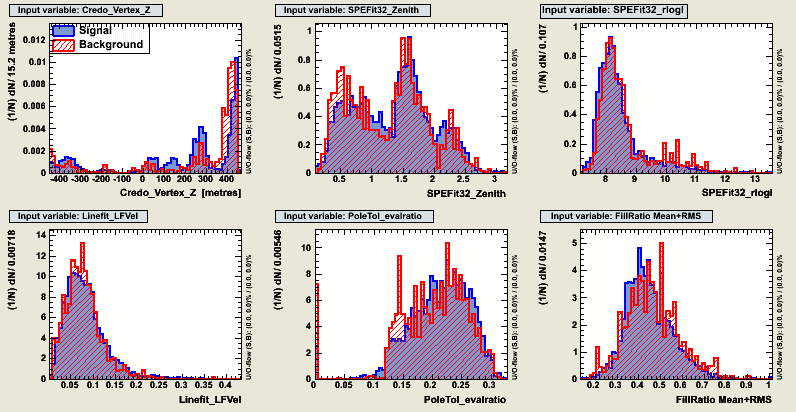
Level 5 TMVA
This plots below are identical to those from TMVA on my level 5 webpage with the 10% burnsample substituted in for signal. This makes no sense in terms of analysis, but is a useful tool in comparing the differences between Experimental Data and CORSIKA at the BDT level cut.
 |
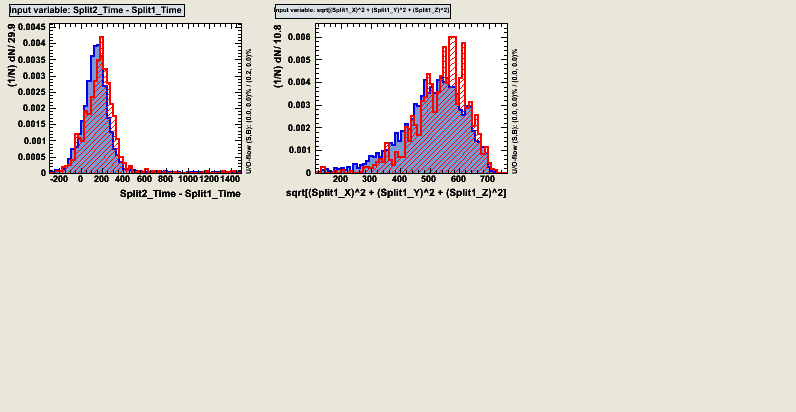 |
Figure 2: Variables used in TMVA.
 |
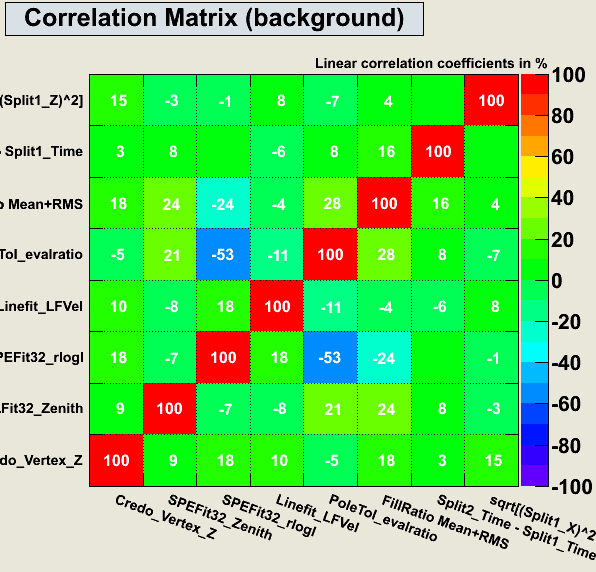 |
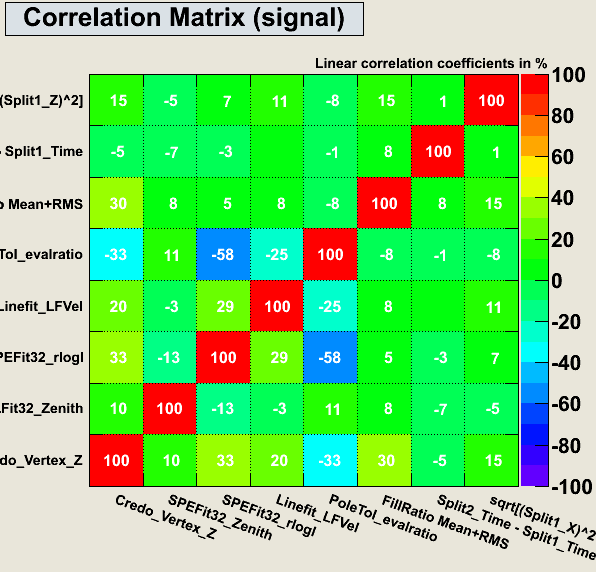
Figure 3: Correlation Matrices for TMVA. a) Signal. b) Background.
 |
 |
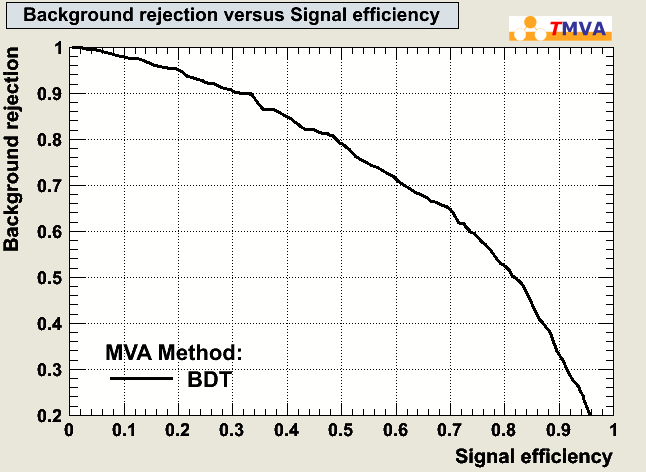 |
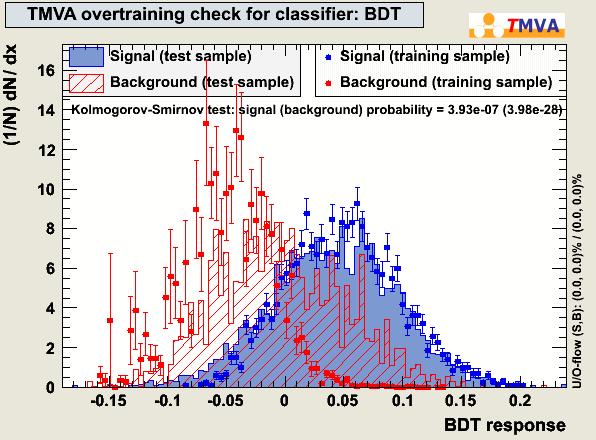
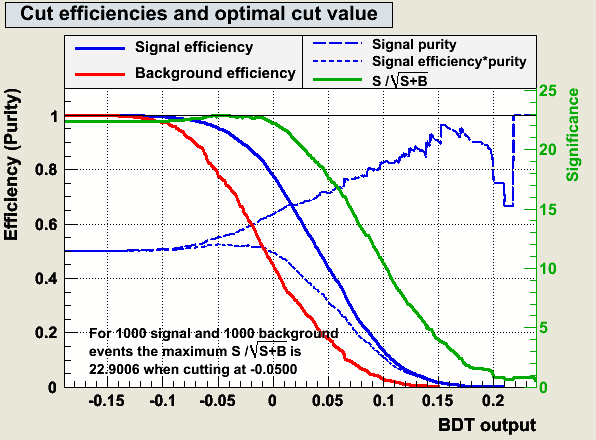
Figure 4: Other TMVA plots. a) Overtraining check. b) Cut efficiencies. c) ROC curve.
|